
Have you noticed cracks appearing in your driveway? Perhaps there’s a pothole that’s been growing larger with each passing month? Or maybe you’re just wondering whether you can tackle those bitumen repairs yourself before they become a bigger headache?
If you’re a homeowner in Cranbourne, you’re not alone. Our local climate can be tough on driveways and knowing which tools to grab can make all the difference between a repair that lasts and one that crumbles within months. Whether you’re dealing with minor surface cracks or more significant damage, having the right equipment on hand is key to getting the job done properly.
In this guide, we’ll walk you through everything you need to know about essential tools for bitumen driveway repairs. From basic hand tools to power equipment, and from the materials you’ll need to step-by-step repair techniques, we’ve got you covered. We’ll also answer some common questions about DIY versus professional driveway tar repair and help you figure out which products work best in Australian conditions. Let’s get stuck into it!
Understanding Your Asphalt Repair Needs
Common Types of Driveway Damage in Cranbourne
Cranbourne’s weather patterns create unique challenges for asphalt surfaces. Hot summers cause expansion, while cooler winters lead to contraction. This constant cycle creates stress on your blacktop driveway, resulting in various types of damage.
The most common issues include hairline cracks, which often appear first. Left untreated, these can widen into alligator cracking—named for its resemblance to reptile skin. Potholes develop when water seeps beneath the surface and erodes the foundation. Edge crumbling is another frequent problem, particularly where driveways meet grass or garden beds.
When to DIY vs. When to Call the Professionals
Small cracks under 10mm wide are perfect candidates for DIY bitumen repairs. Surface-level damage and minor potholes smaller than a dinner plate can also be handled at home with the right tools. However, if you’re seeing extensive cracking across large areas, deep potholes, or structural issues affecting your driveway’s foundation, it’s time to call in the experts. Professional driveway tar repair becomes essential when the damage exceeds what basic tools can fix.
Essential Hand Tools for Bitumen Repair
Crack Cleaning and Preparation Tools
Before any repair material goes down, preparation is everything. You’ll need a stiff wire brush for removing loose debris from cracks. A crack cleaning tool—essentially a hooked scraper—helps dig out vegetation and compacted dirt from deeper gaps.
A good quality broom and a leaf blower make quick work of surface dust. For stubborn weeds growing through cracks, a propane weed torch works brilliantly. Don’t skip this step; dirty cracks mean repairs that won’t stick properly.
Application Tools for Tar Driveway Repair
Once your surface is prepped, you’ll need the right application tools. A caulking gun works well for smaller crack fillers that come in tubes. For larger repairs, a pour pot with a spout gives you better control over liquid bitumen products.
Trowels come in handy for spreading cold patch material into potholes. A margin trowel is ideal for tight spots, while a larger finishing trowel covers broader areas efficiently. Keep a putty knife nearby for detailed work around edges.
Finishing and Smoothing Equipment
Getting a professional-looking finish requires proper smoothing tools. A hand tamper compacts repairs into place effectively. A squeegee helps spread sealants evenly across the surface. For blending repairs into surrounding asphalt, a rubber float creates smooth transitions that won’t catch your tyres.
Power Tools That Make Blacktop Driveway Maintenance Easier
Heat Applicators and Torches
Heat is your friend when working with bitumen. A propane torch helps soften existing asphalt edges, allowing new material to bond better. Heat lances are useful for warming crack filler before application, making it flow more smoothly into gaps.
For larger projects, an infrared heater can warm entire sections of damaged asphalt. This technique lets you reshape and compact existing material without adding new product. It’s particularly effective for surface-level repairs.
Compaction Equipment for Lasting Bitumen Repairs
Proper compaction separates amateur repairs from professional-quality work. A plate compactor is invaluable for pothole repairs larger than 300mm. These machines can be hired from equipment rental shops in Cranbourne.
For smaller repairs, a hand tamper does the job well. Some DIYers use a heavy rubber mallet or even a car tyre driven slowly over the repair. The goal is achieving solid compaction that prevents water infiltration and future settling.
Materials You’ll Need Alongside Your Tools
Choosing the Right Bitumen Filler for Australian Conditions
Australian summers demand products designed for our climate. Look for fillers rated for temperatures above 40°C, as standard products can soften and track into your home during heatwaves. Cold-pour crack fillers work well for hairline damage, while hot-pour products provide stronger bonds for wider cracks.
Premixed cold patch is readily available at hardware stores and requires no heating. It’s perfect for weekend warriors tackling their first bitumen repairs. Just remember to check the product’s temperature tolerance before purchasing.
Sealants and Protective Coatings
After completing repairs, a quality sealant protects your work and extends its lifespan. Coal tar sealers offer excellent protection but have stronger odours. Asphalt-based sealers are more environmentally friendly and easier to apply.
Apply sealant to the entire driveway, not just repaired areas. This creates a uniform appearance and provides protection across the whole surface. Most sealants need reapplication every two to three years for best results.
How Do You Repair a Damaged Bitumen Driveway?
Step-by-Step Guide to Small Crack Repairs
Start by cleaning the crack thoroughly with a wire brush and blower. Remove all loose material, dirt, and vegetation. For cracks deeper than 20mm, fill partially with sand before applying bitumen filler.
Apply your chosen crack filler using a caulking gun or pour pot. Slightly overfill the crack to allow for settling. Use a putty knife to smooth the surface level with surrounding asphalt. Allow the manufacturer’s recommended curing time before driving on the repair.
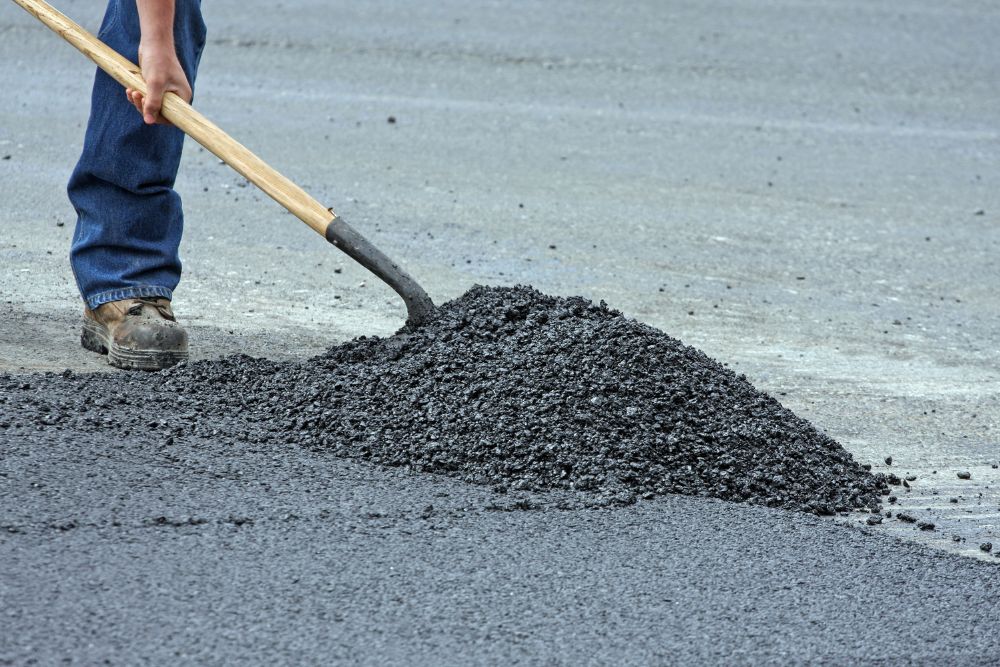
Tackling Potholes and Larger Damaged Areas
Potholes require more preparation. First, cut the damaged area into a rectangular shape using a cold chisel or circular saw. Remove all loose material and debris. Clean the edges and base thoroughly with a brush and compressed air if available.
Apply a tack coat to help new material bond with existing asphalt. Fill the hole with cold patch material in layers of about 50mm, compacting each layer before adding more. The final layer should sit slightly proud of the surface to allow for compaction. Use your tamper or plate compactor until the repair is level and solid.
What Is the Best Product to Repair Asphalt Driveway?
Comparing Cold Mix vs. Hot Mix Solutions
Cold mix products are convenient and beginner-friendly. They’re available in bags at hardware stores and require no special equipment. However, they’re generally less durable than hot mix alternatives and work best for temporary repairs or low-traffic areas.
Hot mix asphalt provides superior strength and longevity. It requires heating before application and sets up harder than cold alternatives. For permanent repairs in high-traffic areas, hot mix delivers better value despite the extra effort involved.
Top-Rated Products Available in Australia
Several quality brands suit Australian conditions. Look for products specifically formulated for our climate extremes. Bitumen-based crack fillers with rubberised additives offer flexibility that prevents cracking during temperature changes.
For pothole repairs, premium cold patch products containing polymer modifiers outperform basic mixes significantly. Read reviews from other Australian users and choose products with proven performance in similar conditions.
Can You Do Bitumen Repairs Yourself?
Skills and Safety Considerations
Basic bitumen repairs are achievable for most handy homeowners. You’ll need patience, attention to preparation, and the right safety gear. Always wear gloves when handling bitumen products, as they can irritate skin. Safety glasses protect against debris during cleaning.
Working with heat requires extra caution. Keep a fire extinguisher nearby when using torches. Never heat bitumen products in enclosed spaces due to fume risks. Proper ventilation is non-negotiable.
Cost Comparison: DIY vs. Professional Driveway Tar Repair
DIY repairs typically cost between $50 and $200 for materials and tool hire. Professional bitumen driveway repairs in Cranbourne generally start around $300 for minor work and can exceed $1,500 for extensive damage.
The cost savings make DIY attractive for small repairs. However, factor in your time and the risk of mistakes requiring professional correction. For significant damage, professional repairs often prove more economical long-term.
How Long Do Bitumen Driveway Repairs Last?
Factors Affecting Repair Longevity in Cranbourne’s Climate
Quality repairs can last five to ten years with proper maintenance. Factors influencing longevity include preparation quality, product selection, compaction effectiveness, and weather conditions during application.
Cranbourne’s hot summers stress repairs, particularly those made with lower-quality products. Repairs made during mild weather generally perform better than those applied in extreme heat or cold.
Maintenance Tips to Extend Your Repair
Regular sweeping prevents debris accumulation that traps moisture. Address new cracks promptly before they expand. Apply sealant every two to three years to protect both repairs and surrounding asphalt.
Avoid parking heavy vehicles on recently repaired areas for at least a week. Keep chemicals like petrol and oil away from asphalt surfaces, as these break down bitumen over time.
Where to Buy Quality Bitumen Repair Tools in Cranbourne
Bunnings and local hardware stores stock basic supplies. For specialised equipment, consider equipment hire centres for items like plate compactors. Trade suppliers offer professional-grade products often unavailable at retail stores.
Online retailers provide wider product selection, though you’ll wait for delivery. Local landscape supply yards sometimes stock bitumen products at competitive prices, particularly for larger quantities.
Getting Started with Your Asphalt Repair Project
Taking on bitumen driveway repairs might seem daunting initially, but with the right tools and preparation, it’s achievable for most homeowners. We’ve covered the essential hand tools for cleaning and application, power equipment for professional-quality results, and the materials that work best in Australian conditions.
Remember, preparation makes all the difference. Clean surfaces thoroughly, choose products rated for our climate, and don’t rush the compaction stage. Small repairs done well can save you thousands compared to full driveway replacement down the track.
If you’re located in the southeast suburbs and want expert support, professional Asphalt Repairs Cranbourne services can help ensure long-lasting results, especially for larger cracks, drainage issues, or heavily worn driveways.
Ready to tackle your driveway? Start with the basics—a wire brush, crack filler, and tamper—and build your toolkit as needed. Your future self will thank you for addressing those cracks now rather than waiting until they become potholes. Good luck with your project!